➡️ Related Guides
- ✔ How to authorize Dedicated, Semi-Dedicated, or ISP Proxies
- ✔ How to authorize IPv6 Proxies
- ✔ For Residential (Rotating) Proxies, follow this Residential Proxy Authorization Guide.
➡️ Overview
Rayobyte’s Rotating Proxies automatically switch their public IP address every 10 minutes, ensuring maximum anonymity and uptime. Once you purchase a rotating proxy package, you’ll receive a single IP with multiple ports — each port provides a unique rotating IP.
108.46.12.64:1081
108.46.12.64:1082
108.46.12.64:1083
108.46.12.64:1084
108.46.12.64:1085

When you use one of these ports (e.g., 108.46.12.64:1081), your browser or application will display a different public IP (e.g., 106.39.12.61) instead of your real one.
➡️ Authorizing Rotating Proxies
✔ Step 1: Retrieve Your Device IP
- ✔ Open your browser and visit What is My IP to identify your public IP address.
✔ Step 2: Log in to Your Rayobyte Dashboard
- ✔ Go to your IPv4 Proxy Dashboard.
- ✔ Under Authorization Type, select Via IP and HTTP.
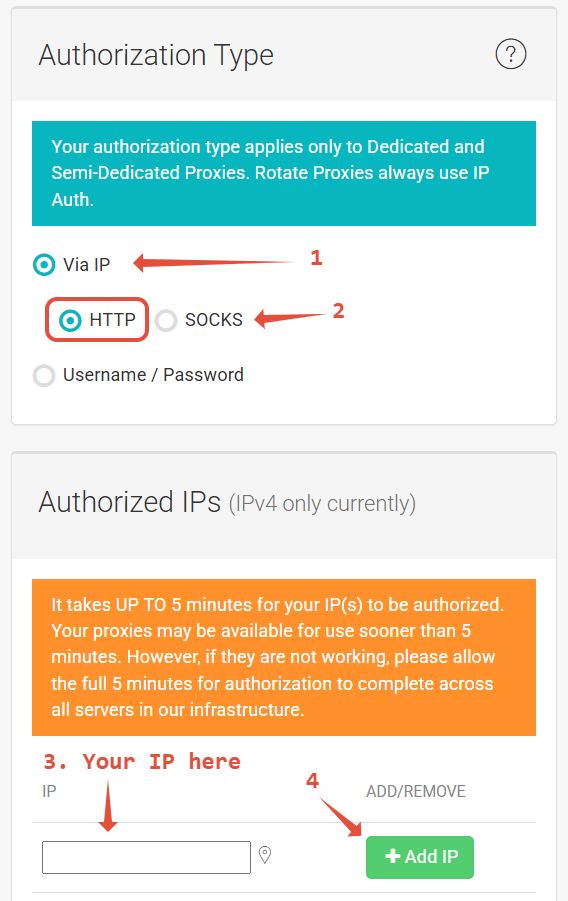
Example: Setting your IP authorization in the Rayobyte Dashboard
✔ Step 3: Add Your Authorized IP
- ✔ Enter your device’s IP under Authorized IPs and click Add IP.
- ✔ Once added, your device is now authorized to access the proxy network.
✔ Step 4: Configure Your Browser or Software
Use the provided IP and port combinations to connect your application or browser to the proxy network. Below is an example configuration using Firefox:
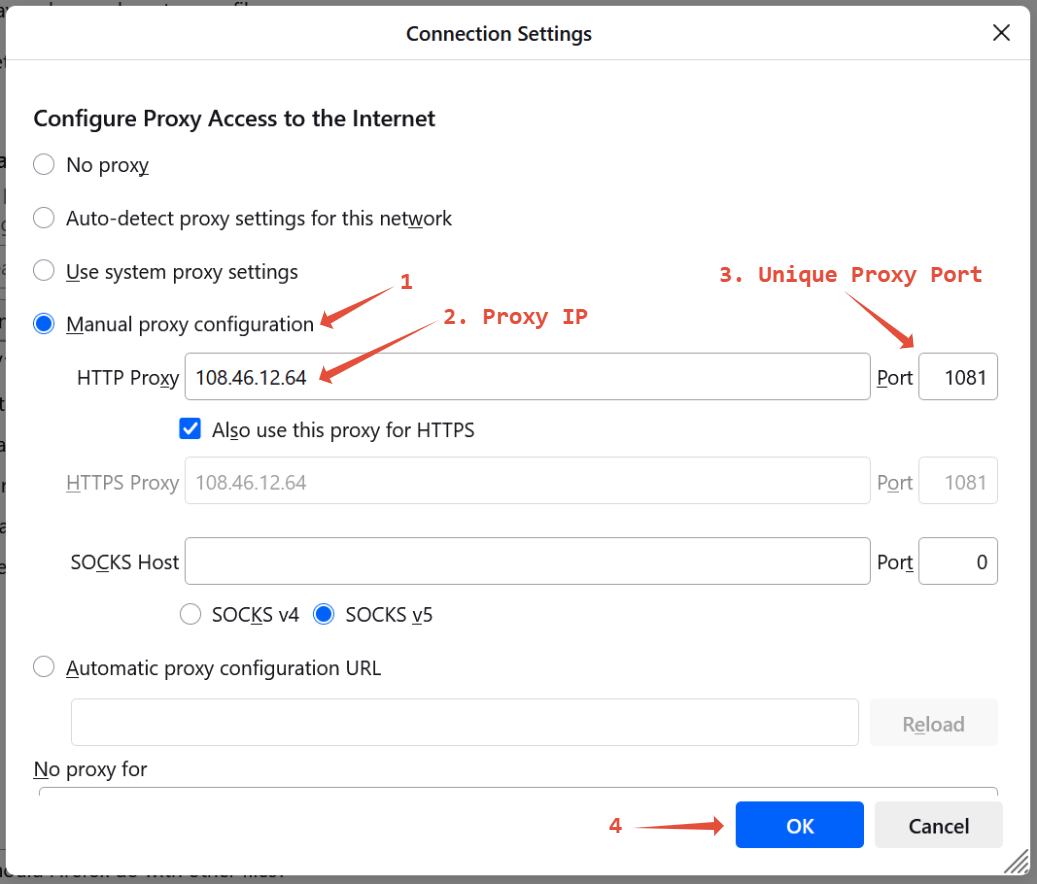
Example: Configuring a rotating proxy in Firefox
➡️ Important Notes
- ✔ Rotating proxies do not support SOCKS and can only be authorized via IP.
- ✔ If you require proxies that support username and password authorization, please use our Dedicated, Semi-Dedicated, or ISP Proxies.
➡️ Need Help?
If you’re still experiencing issues, our support team is here to help!
✔ Explore More Rayobyte Guides in our Knowledge Base
✔ Happy Scraping!